Getting Started
To begin using the XDM application, new users must first complete the account setup and email verification process.
Verify Email
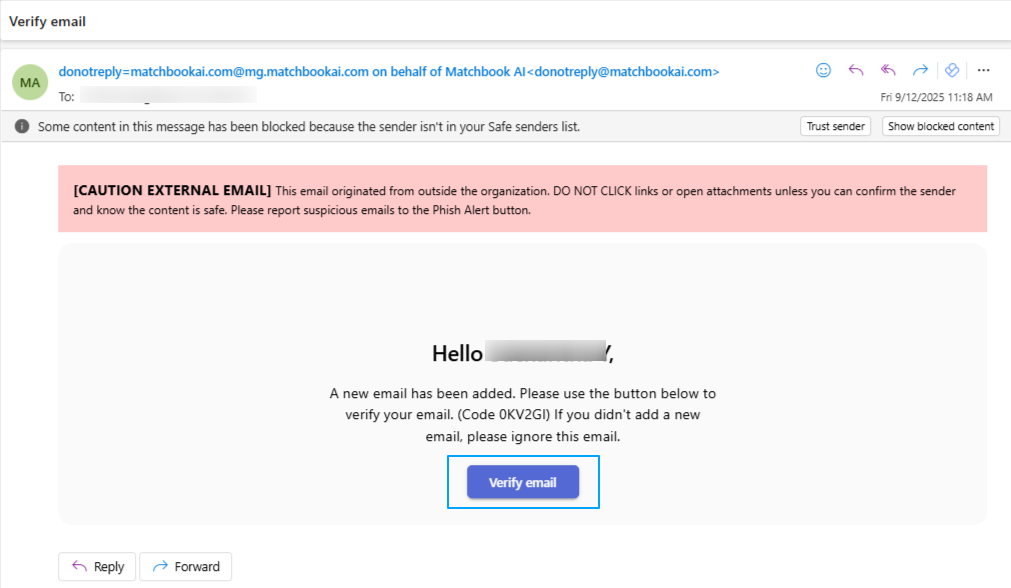
When a new account is created, an email notification titled “Verify Email” will be sent to your registered email address from the Matchbook AI Support team. Click on the Verify Email button in the message, as shown in the screenshot below.
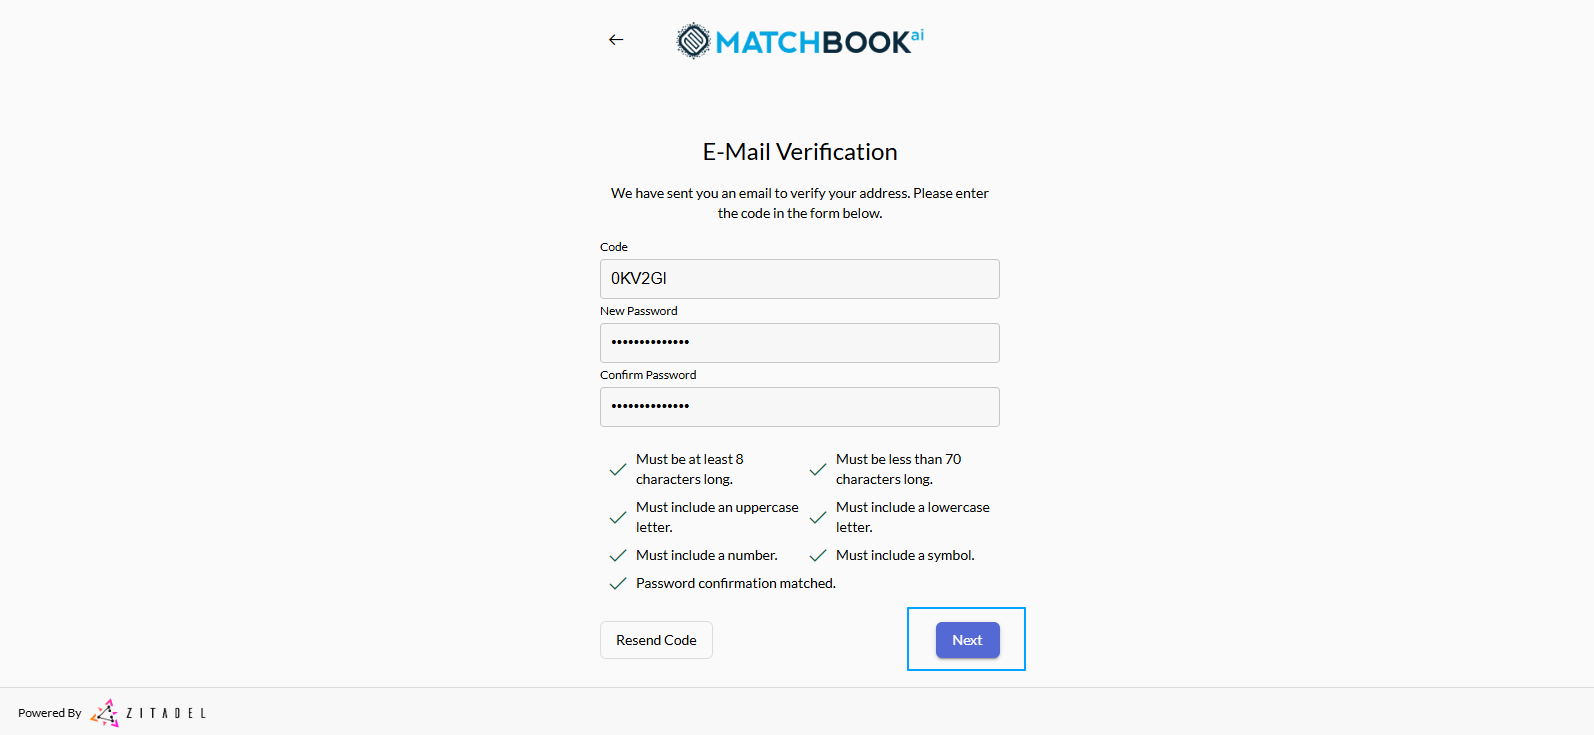
You will be redirected to the Email Verification page, where you need to fill in the required fields:
Code: The code is entered by default (otherwise enter the code that is given in the email).
New Password: Create a password following the rules below:
Minimum of 8 characters and maximum of 70 characters.
At least one uppercase letter
At least one lowercase letter
At least one number
At least one symbol
Confirm Password: Re-enter the password to confirm.
Now, click Next. If you haven’t received the code, click Resend Code to generate a new one.
Note
User account passwords are configured to expire after a defined period of time, typically three months from the date of first login. Once this period is exceeded, the account will be locked, and the user will no longer be able to access the system until the password is reset. When attempting to log in with an expired password, the system displays the message: “Your account is locked due to password expiration. Please reset your password or contact support”. If email notifications are enabled, users will also receive instructions for resetting their password. Administrators can manually unlock or reset expired accounts if required.
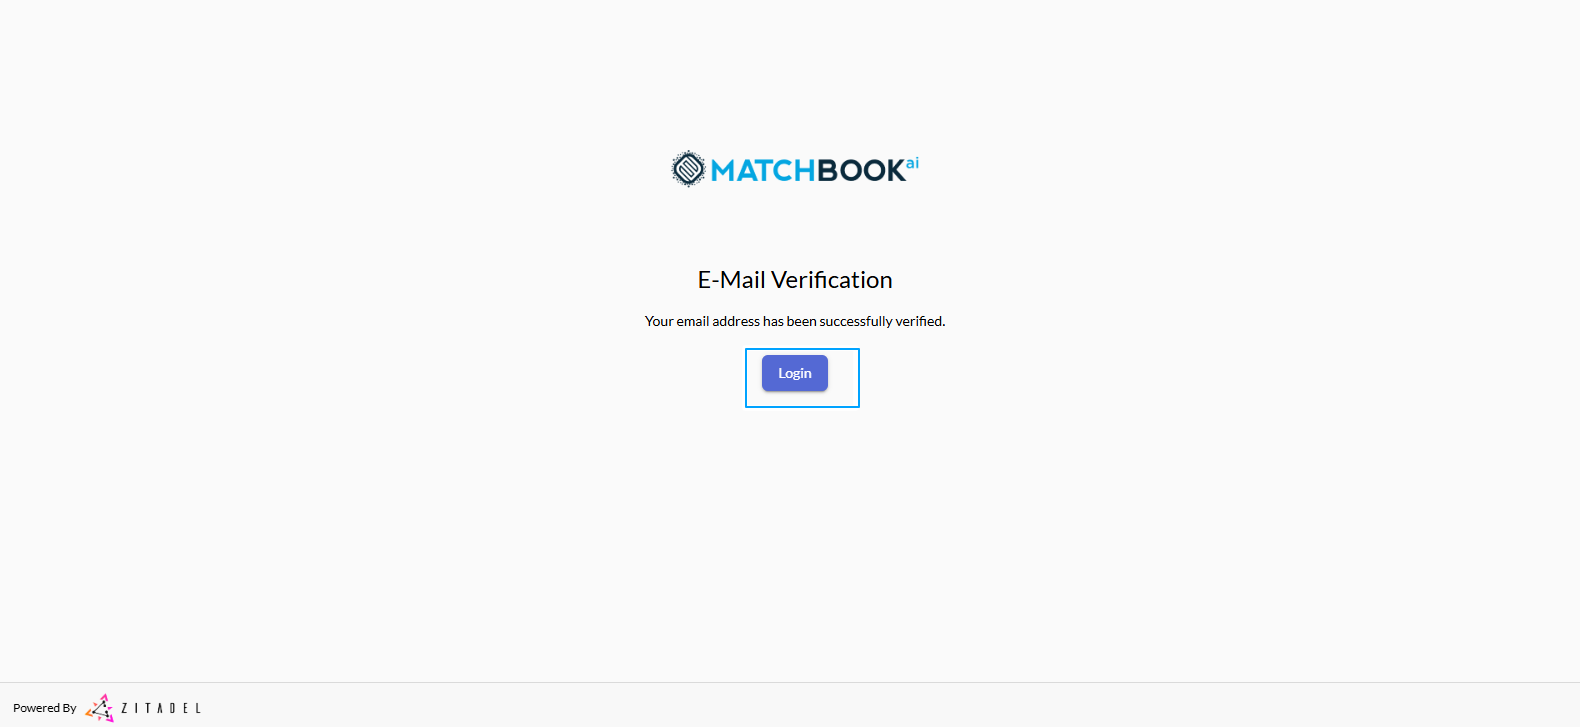
Next, you will see the message: “Your email address has been successfully verified”. Click on Login.
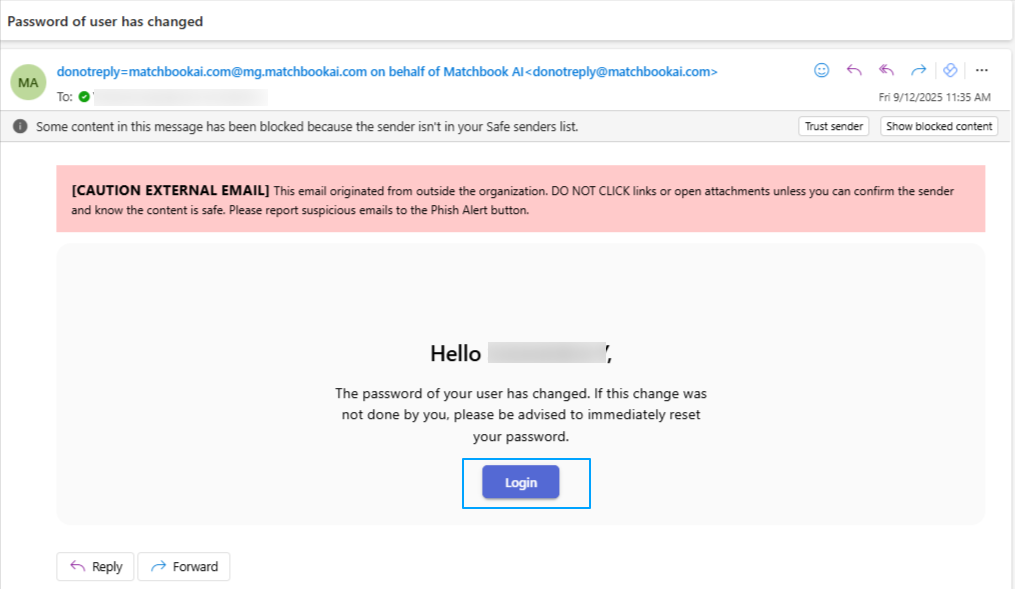
Alternatively, an email notification titled “Password of user has changed” will be sent. In this email, click the Login button as shown in the screenshot and follow the steps outlined below.
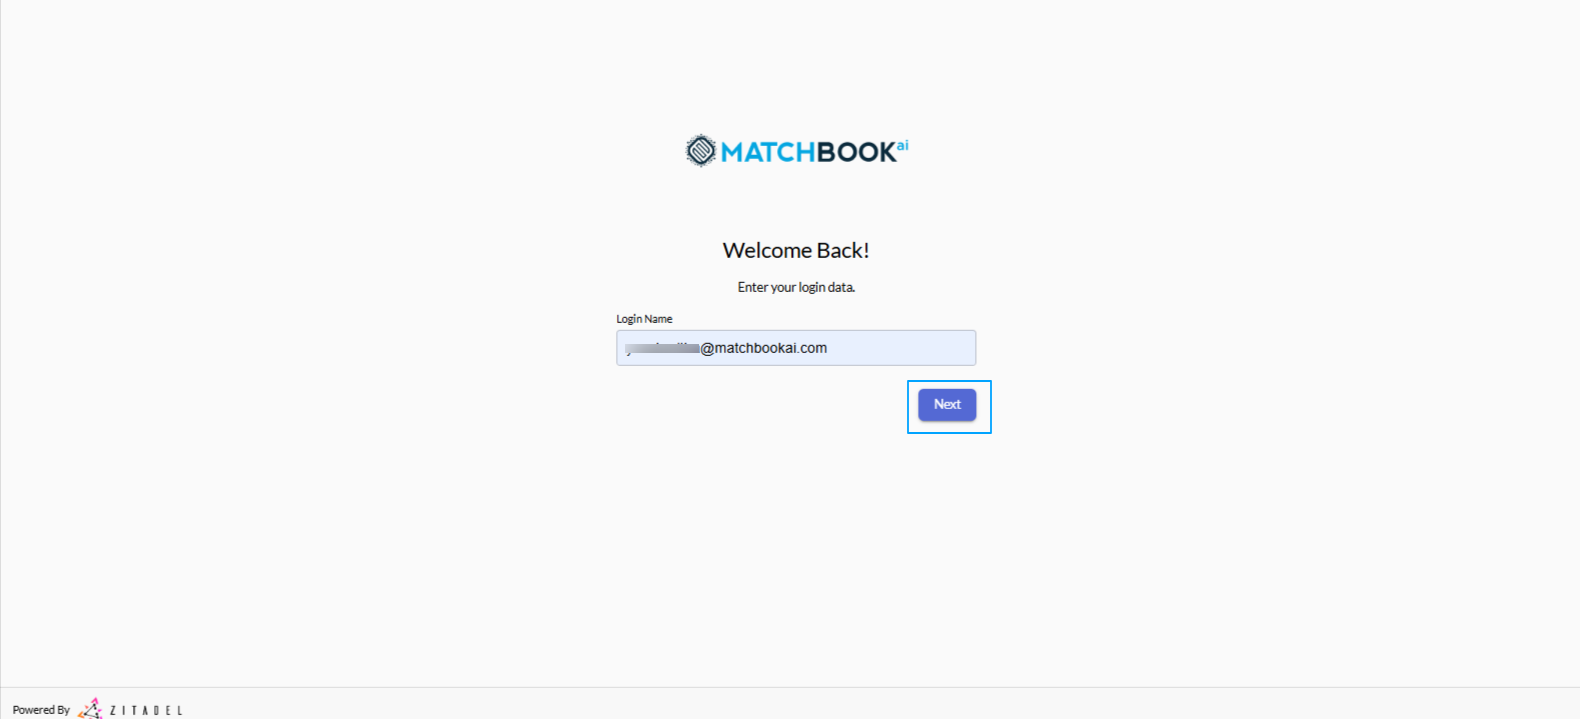
Enter the Login name (that is your registered email id) and click Next.
If the field is left blank, the system will display the message: “Please fill out this field”.
If an invalid username is entered, the system will display the message: “User could not be found”. Re-enter a valid username and click Next to continue.
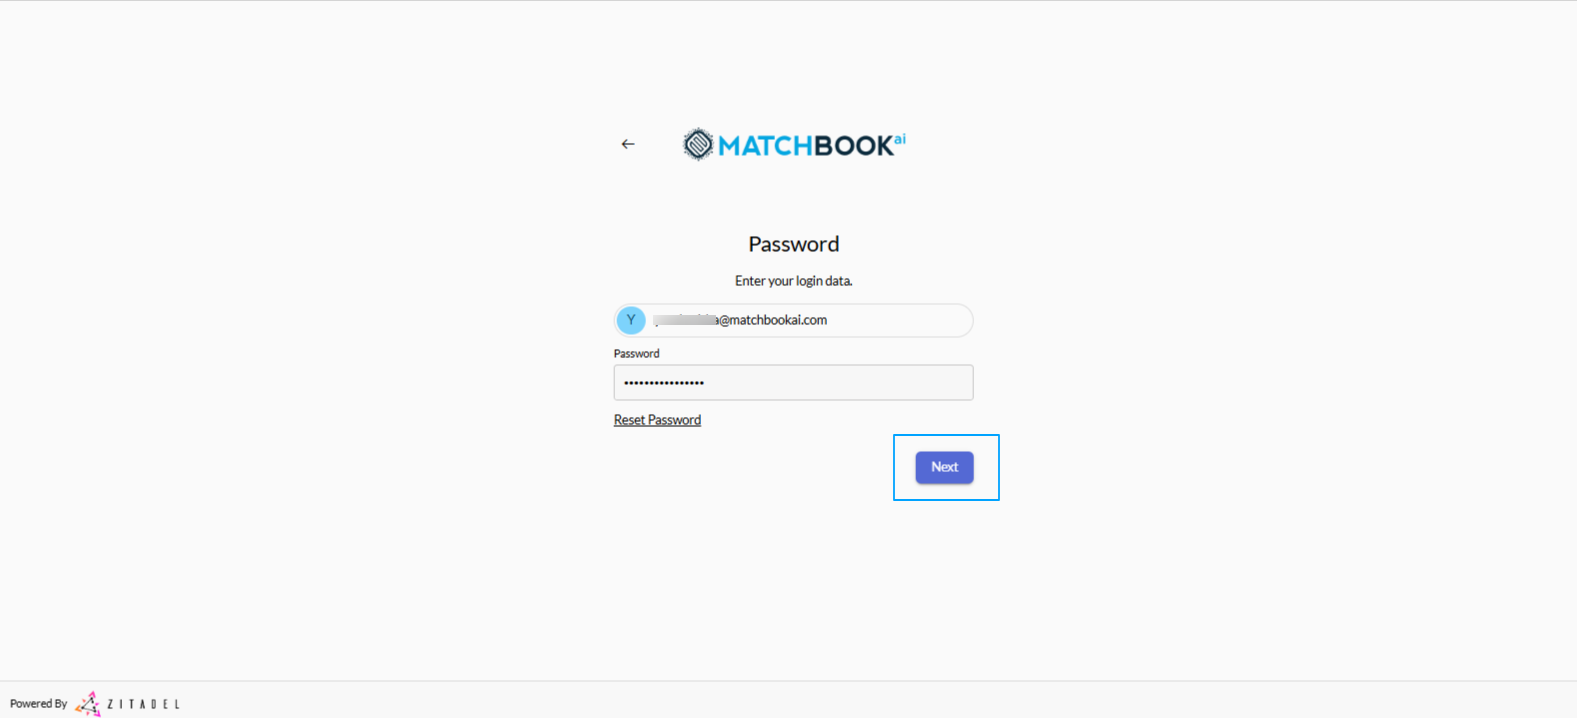
Now, enter your password in the provided field and click Next.
If the password entered is incorrect, the system will display an error message “Password is invalid”.
Re-enter the correct password to proceed.
To reset your password, go to the Reset Password section and follow the steps to reset as per instructions.
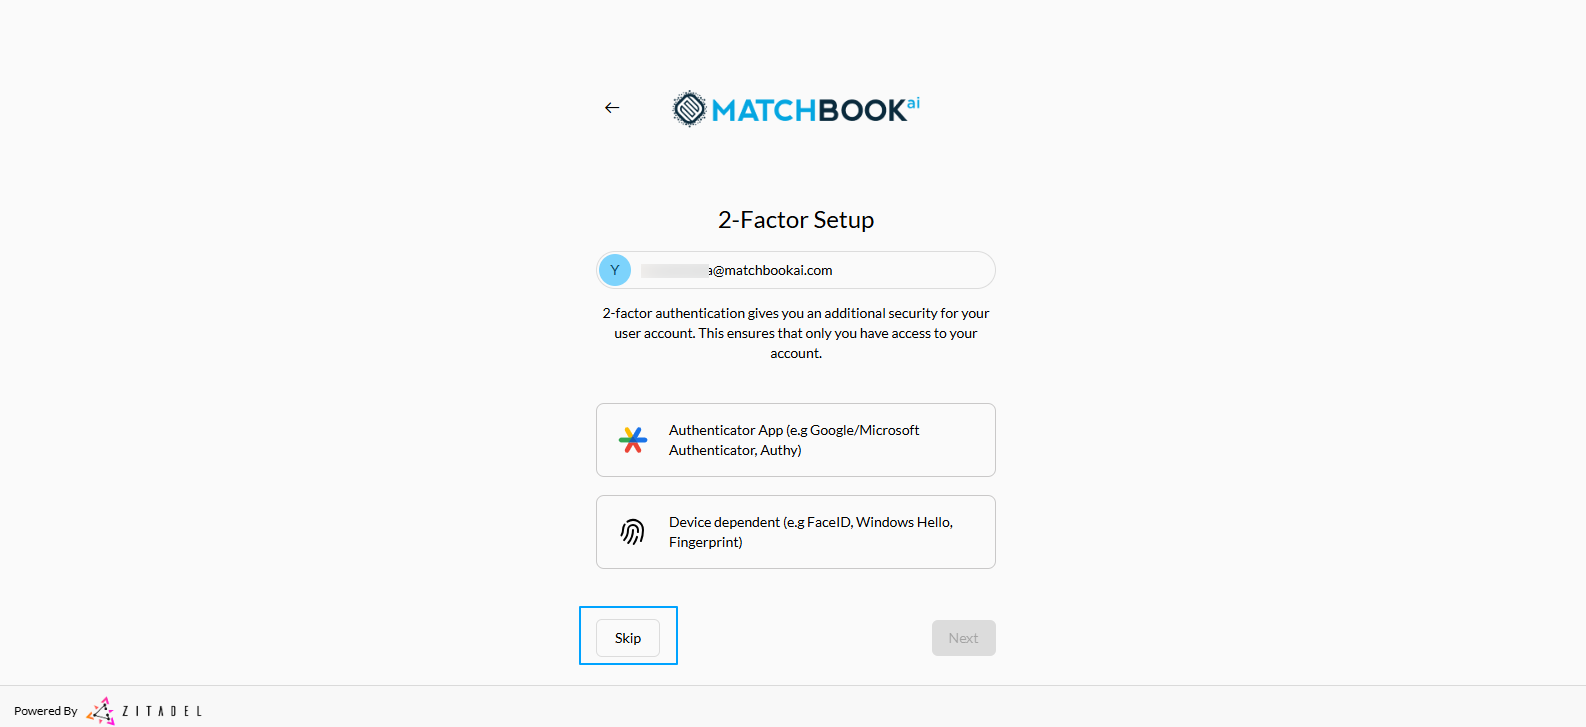
If you want to enable Two-Factor Authentication (2FA), go to the 2-Factor Setup section where you can select either an Authenticator App (such as Google Authenticator or Microsoft Authenticator) or a Device dependent (i.e., FaceID, Windows Hello, or Fingerprint recognition) authentication. Once configured, you will be required to enter the verification code generated by your chosen method each time you log in, ensuring enhanced account security.
In this step, the option Skip is selected to set up Two-Factor Authentication (2FA) later; however, enabling it is strongly recommended for better account protection.
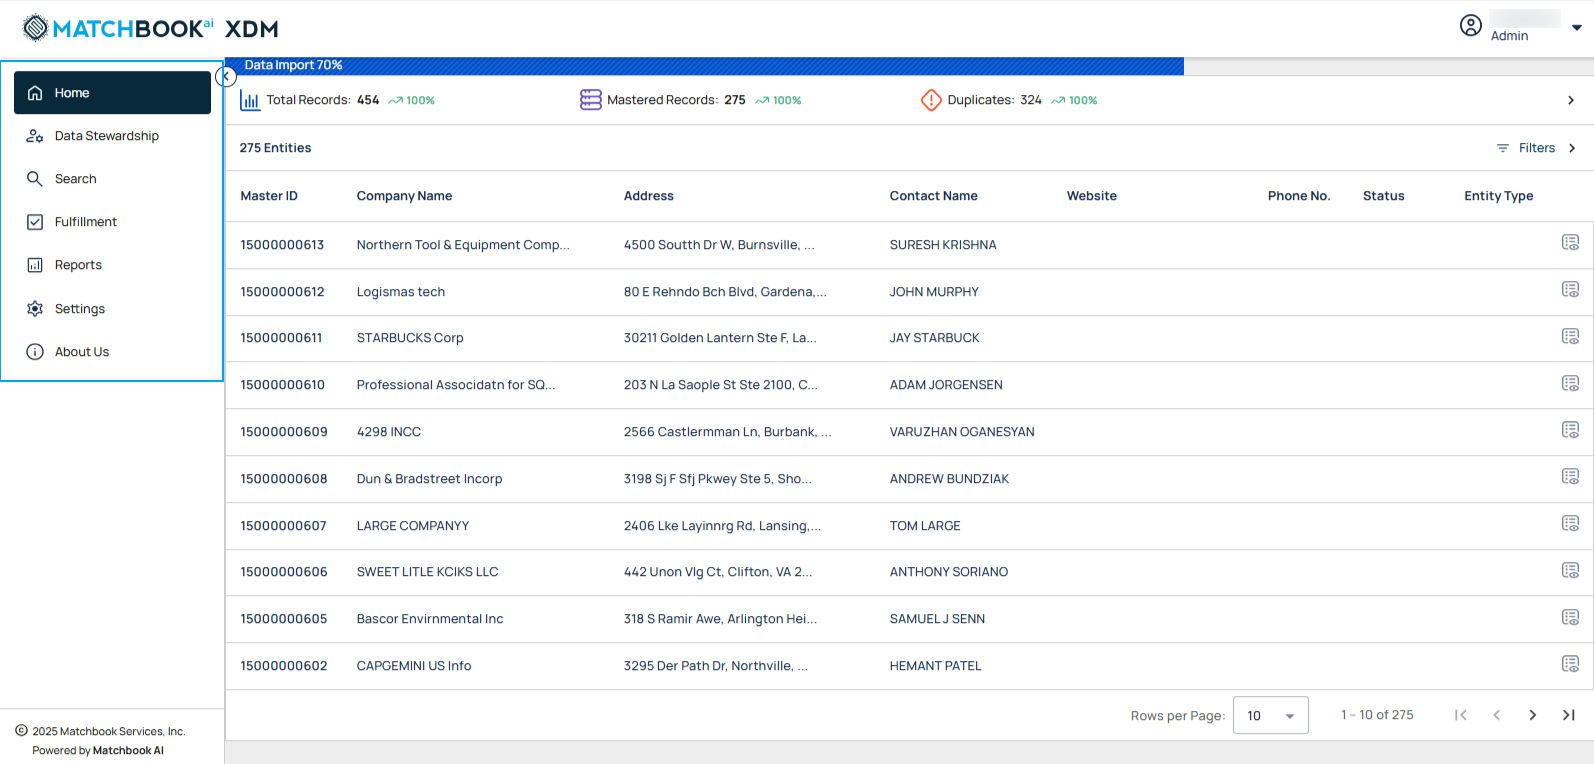
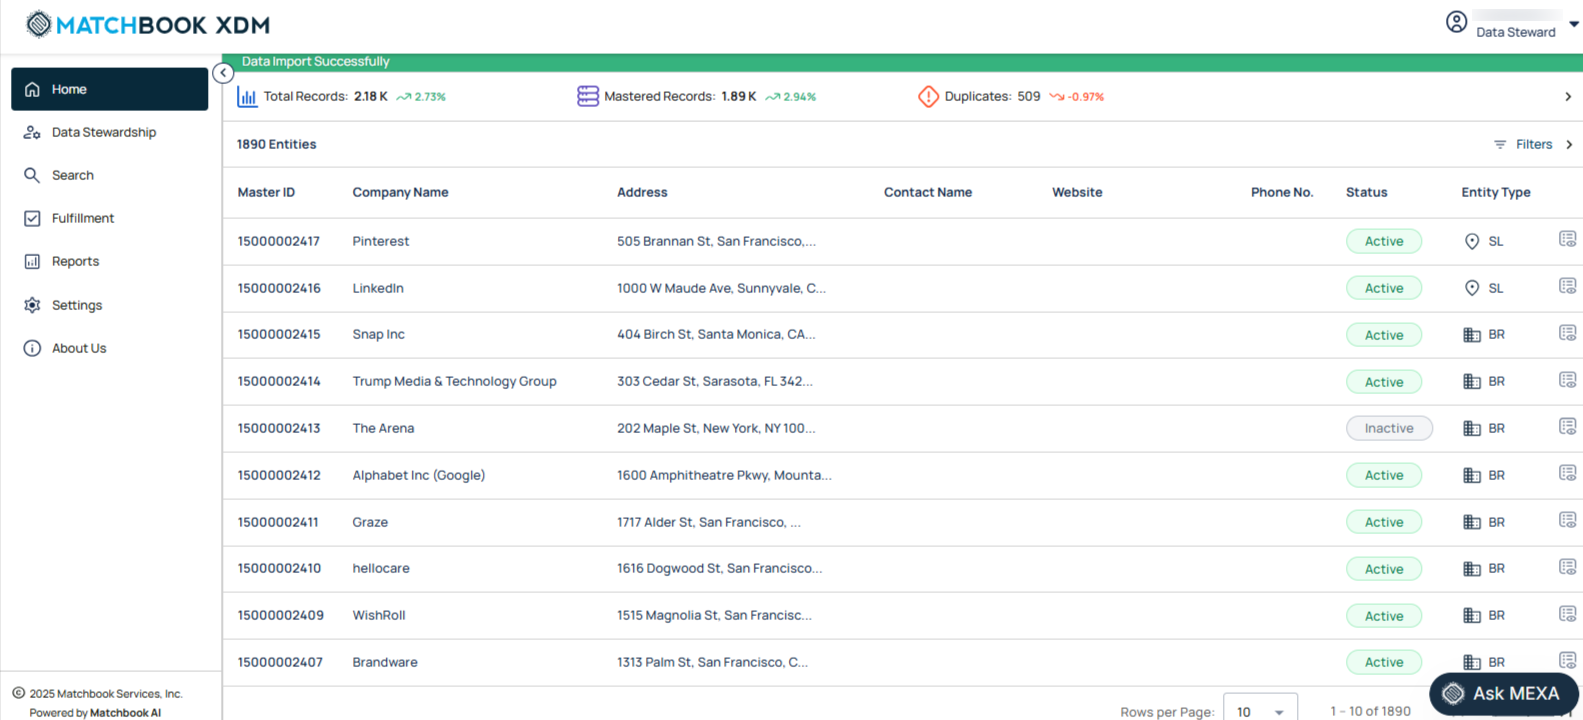
After successful login, you will be redirected to the Matchbook XDM dashboard (go to Home section, where you can access the available features of the platform).
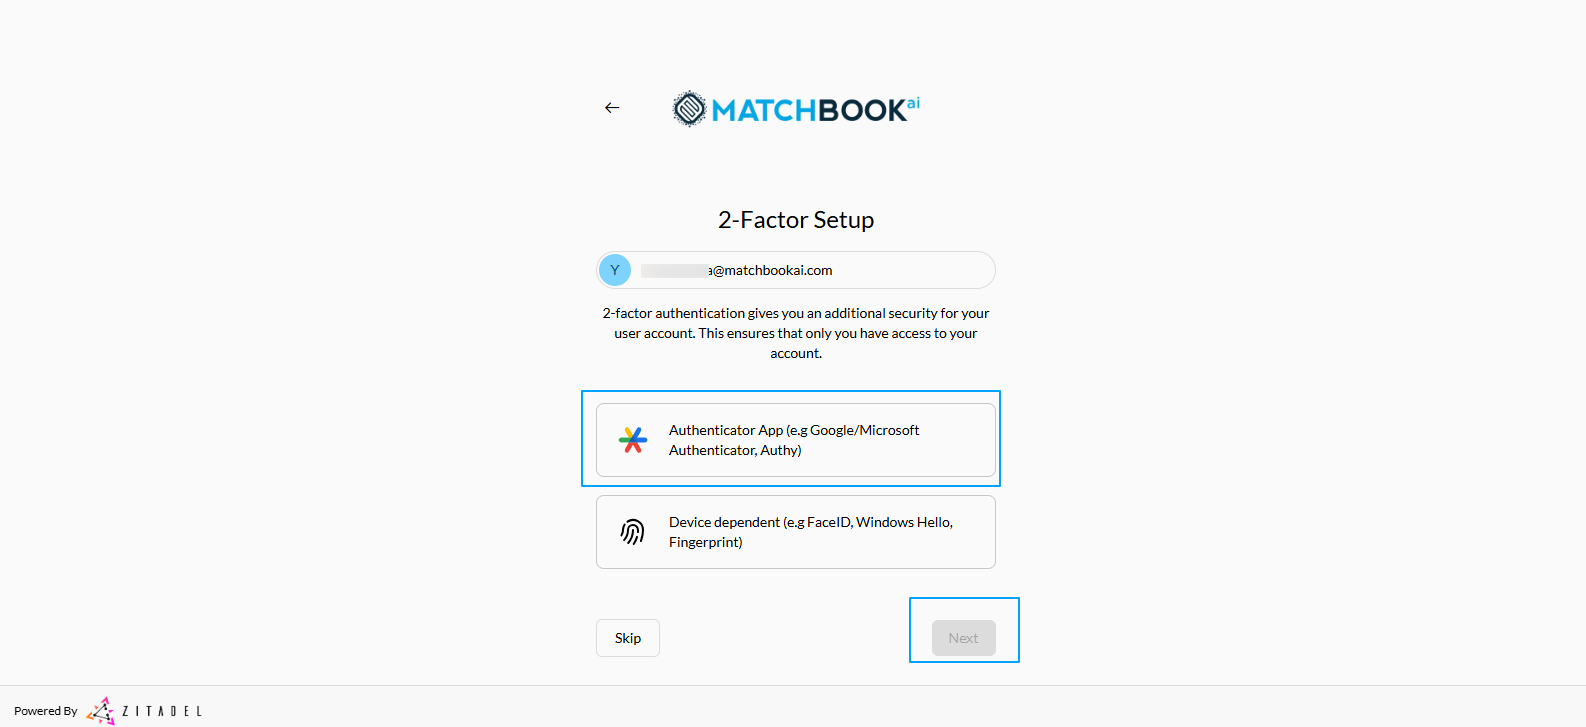
2-Factor Setup
After activating your account, you will be prompted to configure 2-Factor Authentication (2FA). This step provides an additional layer of security, ensuring that only you can access your account.
On the 2-Factor Setup page, you will see your registered email address and the following options:
Authenticator App: Use apps such as Google Authenticator, Microsoft Authenticator, or Authy to generate secure login codes.
Device Dependent Authentication: Use built-in device security methods such as FaceID, Windows Hello, or Fingerprint recognition.
Authenticator App
Select Authenticator App and click Next.
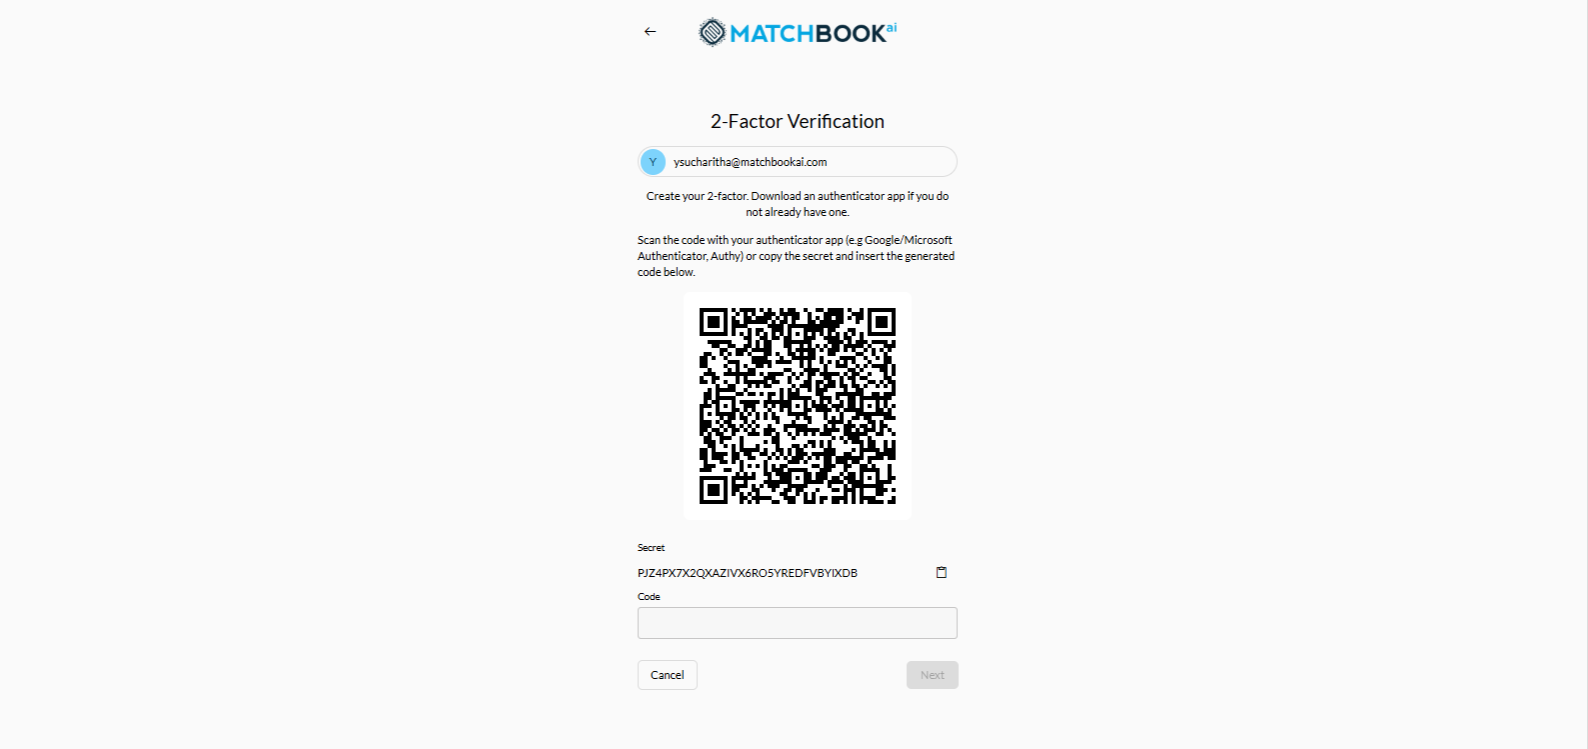
On this 2-Factor verification page:
Your registered email address is displayed at the top.
A QR code is provided. Scan this QR code using your authenticator app (e.g., Google Authenticator, Microsoft Authenticator, or Authy).
If you are unable to scan the QR code, you can use the provided Secret Key to manually set up the authenticator app.
Once the setup is complete, the authenticator app will generate a 6-digit code. Enter this code in the Code field.
Finally, click Next to complete the 2-Factor Authentication setup. If you do not want to proceed, click Cancel to return to the previous screen.
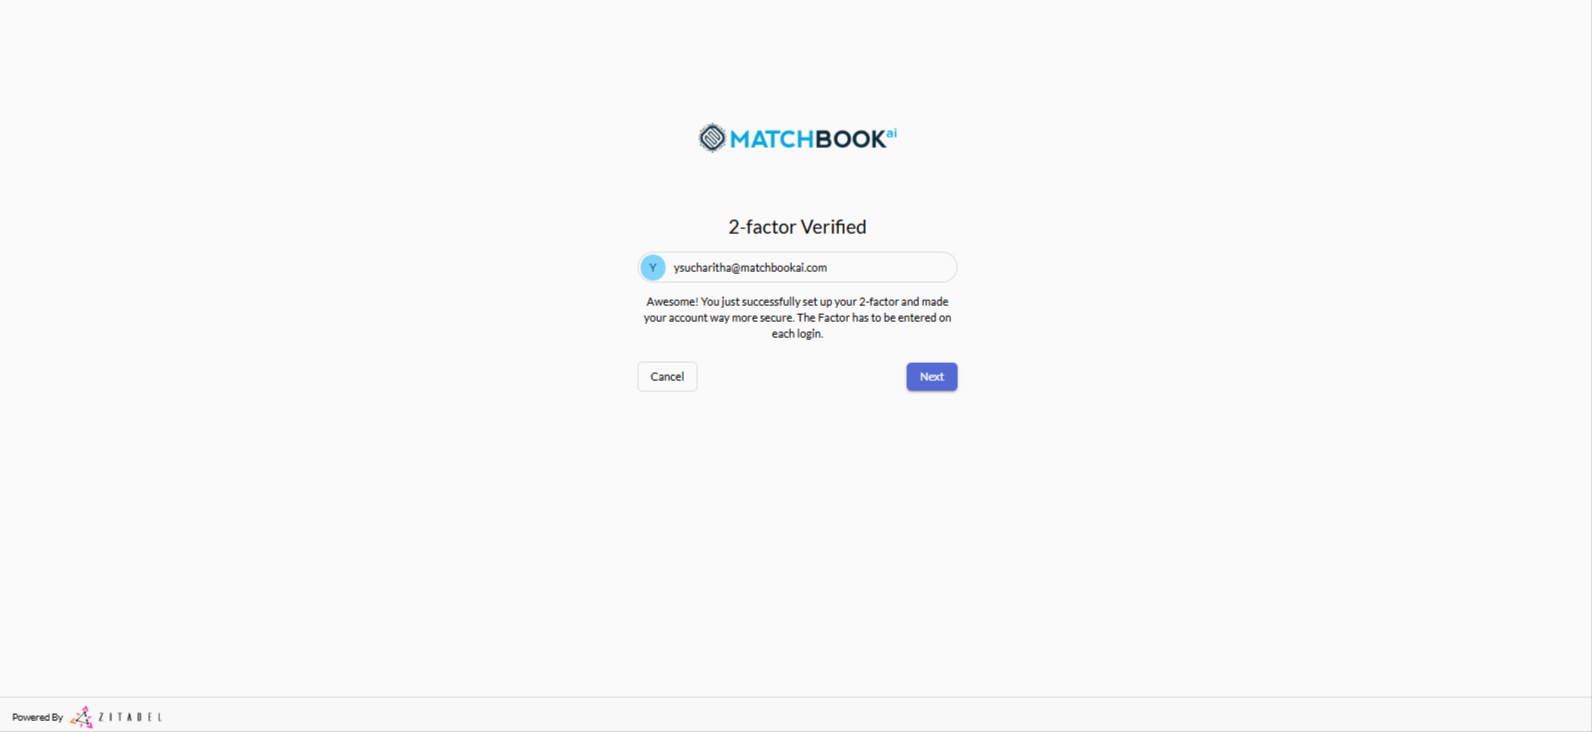
After you complete the device authentication or authenticator app verification, the system displays a 2- Factor Verified screen, with a confirmation message stating, “Awesome, you just successfully set up your 2-factor and made your account way more secure. The factor has to be entered on each login”.
Click Next, then you will be directed to your Matchbook XDM dashboard (go to Home section, where you can access features and perform tasks based on your assigned role and permissions).
Otherwise click Cancel to exit the setup.
From this point onward, each time you log in, you will be required to enter the 2-Factor Authentication to securely access your account.
Device Dependent Authentication
Select Device Dependent Authentication (FaceID, Windows, Fingerprint Recognition) and click Next.
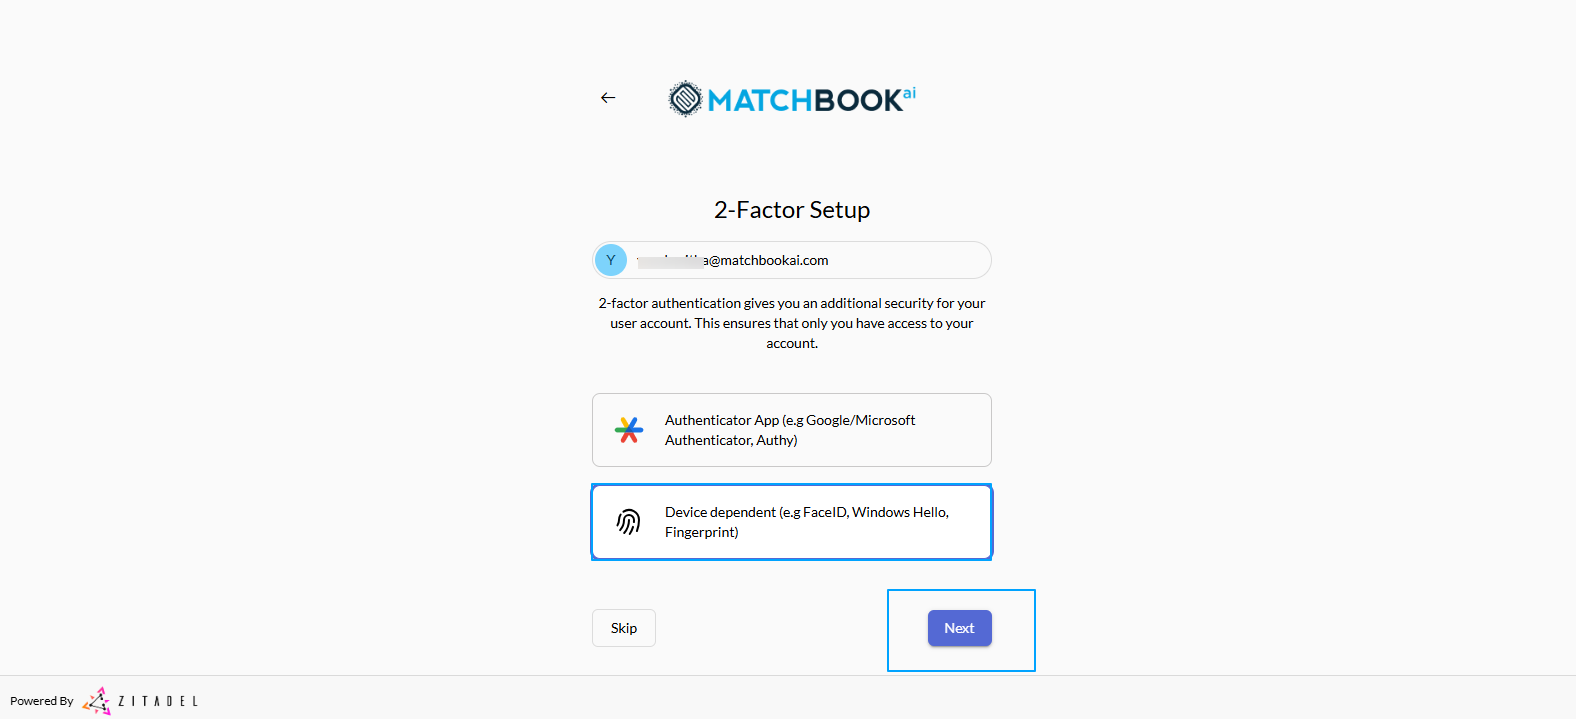
You will be prompted to use your device’s built-in security method, such as Face ID, Windows Hello, or Fingerprint Recognition.
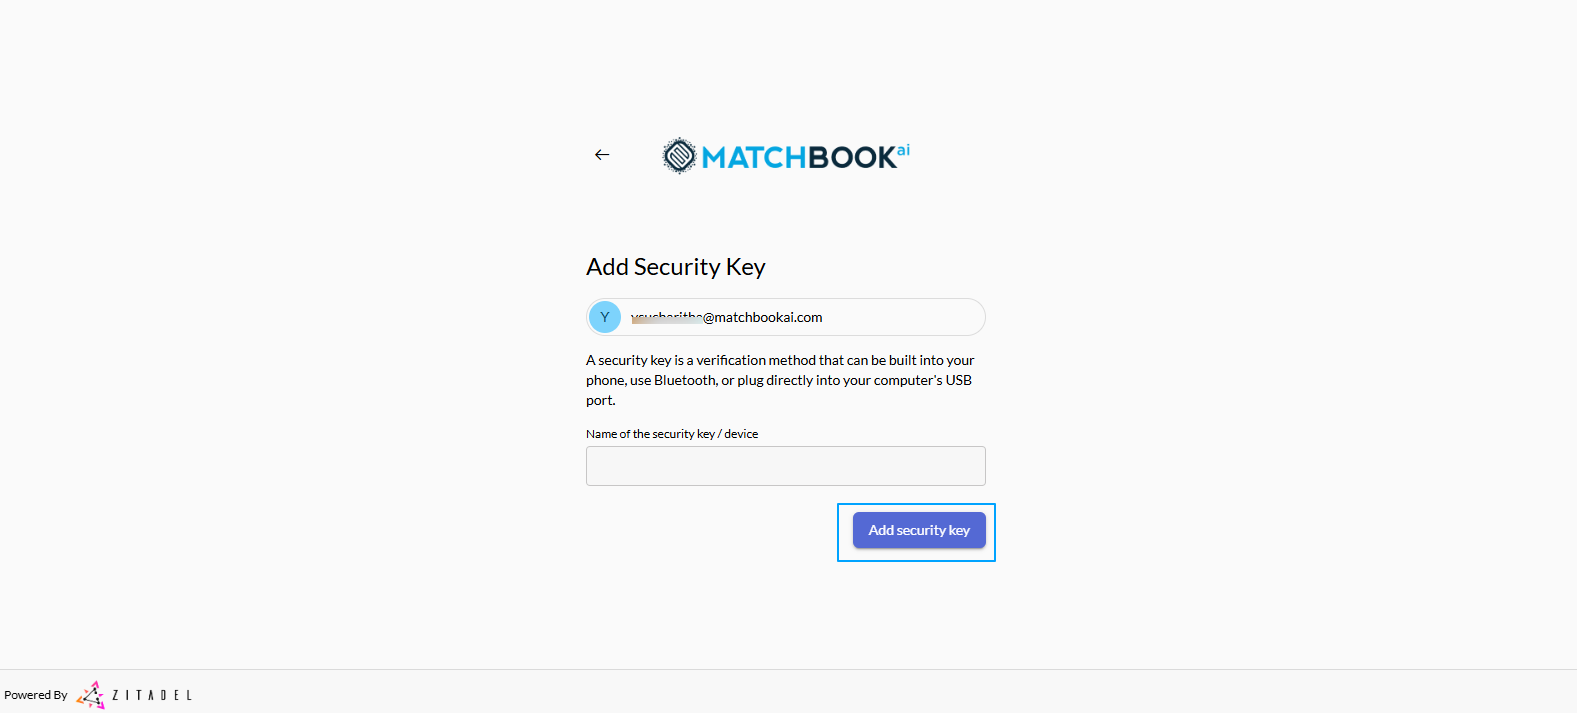
Enter the Name of the security key/device in the box provided and click Add Security Key.
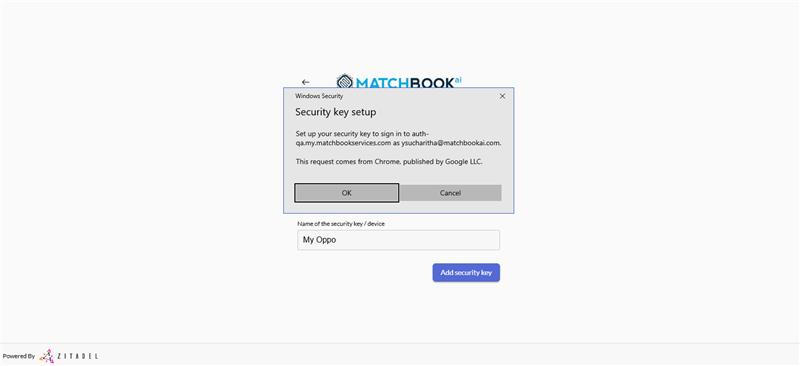
When a pop-up window titled, “Security key setup” opens, click OK. Otherwise click Cancel to exit the setup.
Now, insert your security key into the USB port. Otherwise click Cancel to exit the setup.
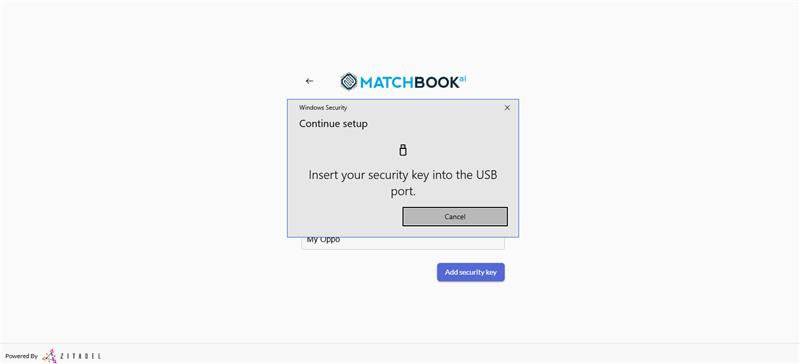
By clicking Cancel in the previous step, you will see a message as shown in the screenshot below.
If your device does not support this method, you will need to go back and choose the Authenticator App option instead.
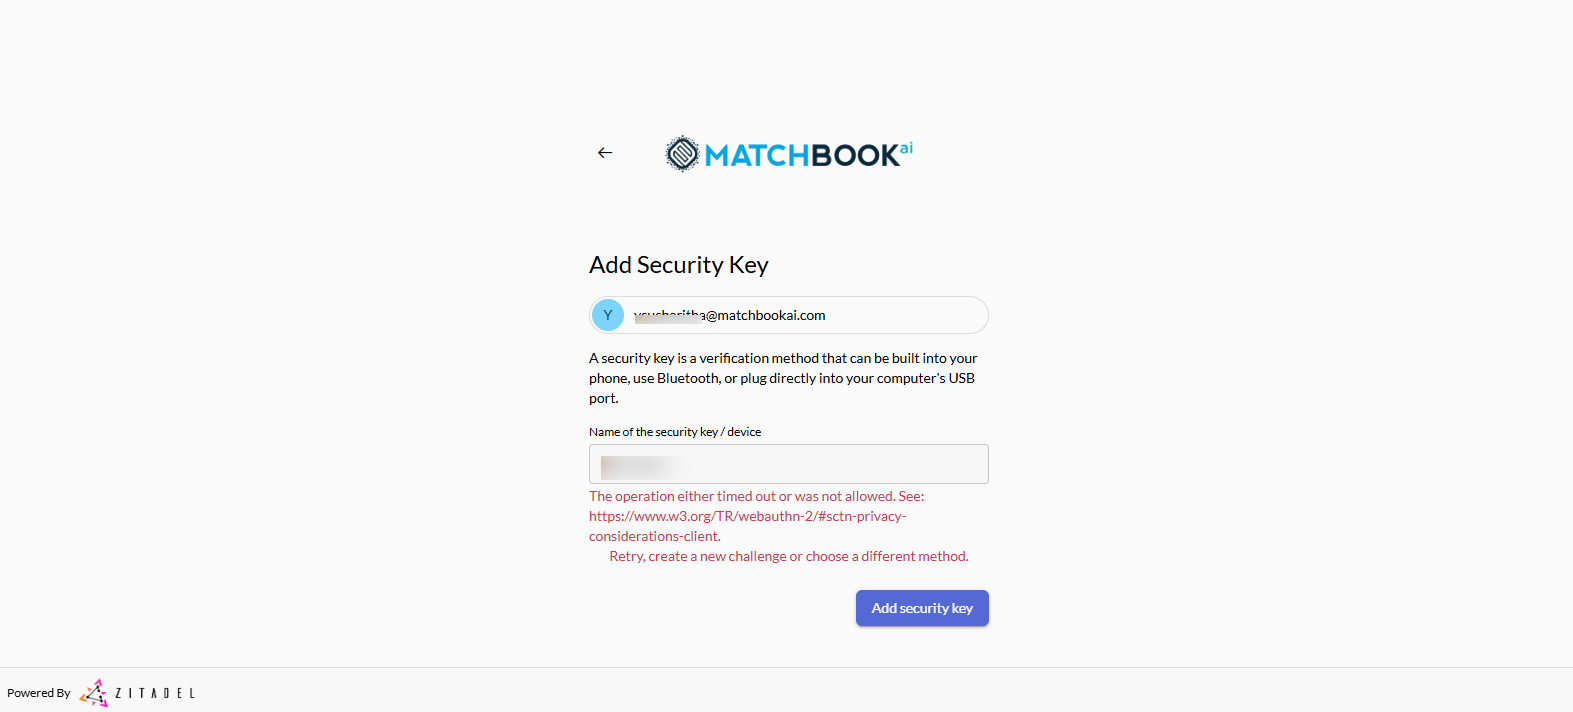
From this point onward, each time you log in, you will be required to enter the Security key to securely access your account.
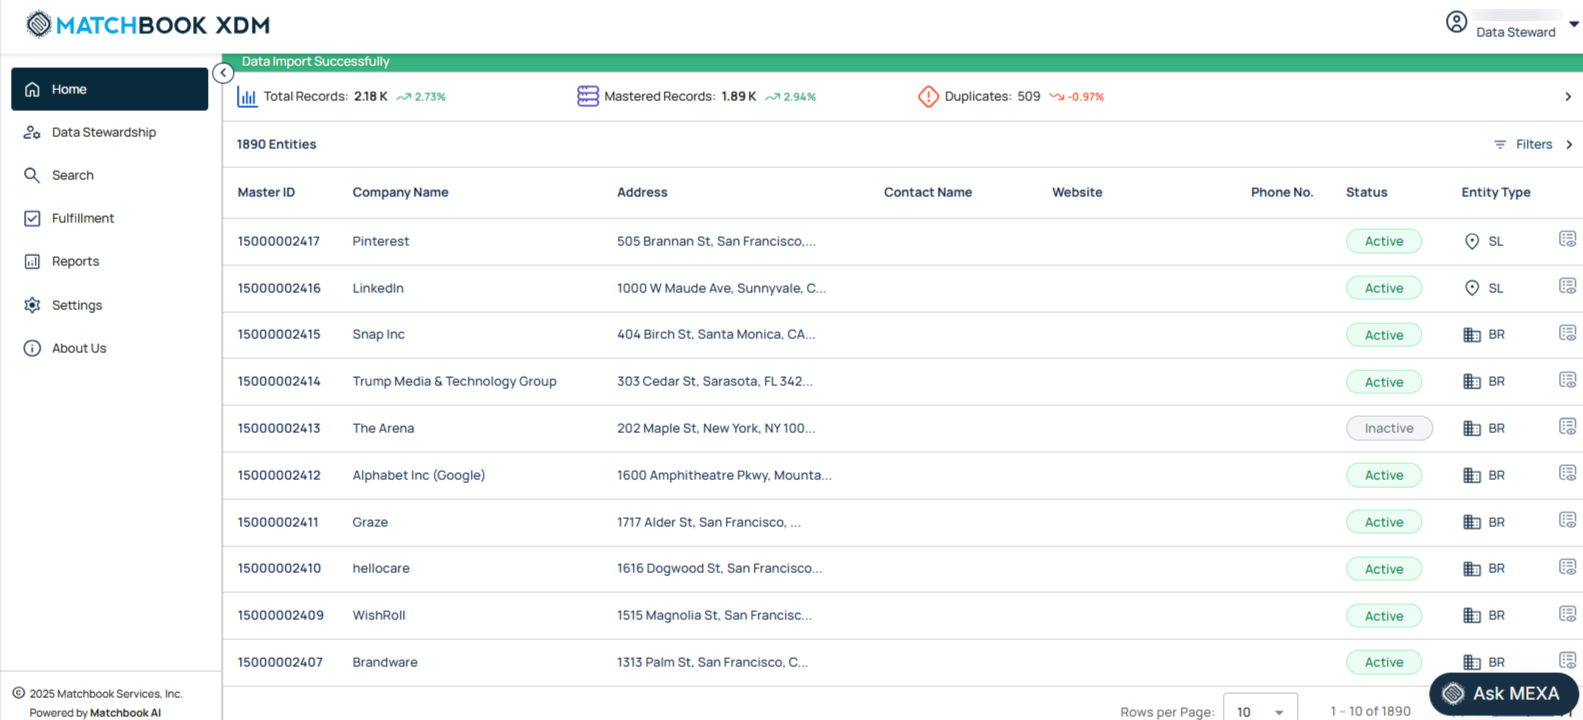
You will then be directed to your Matchbook XDM dashboard (go to Home section, where you can access features and perform tasks based on your assigned role and permissions).
Troubleshoot Login Issues
To access the XDM application, users must log in using their registered email address and password or 2-factor authentication. The login process ensures secure authentication and protects access to role-based features within the platform.
Valid Login: Entering the correct username and password authenticates the user and redirects them to the Home Page.
Account Lockout after Multiple Failed Login Attempts: To enhance security and prevent brute-force attacks, the system automatically locks a user account after multiple failed login attempts. By default, an account is locked after five consecutive failed attempts, though this limit may vary based on customer configuration.
Once locked, the user will see a message stating: “User is locked (EVENT-FJ262)”.
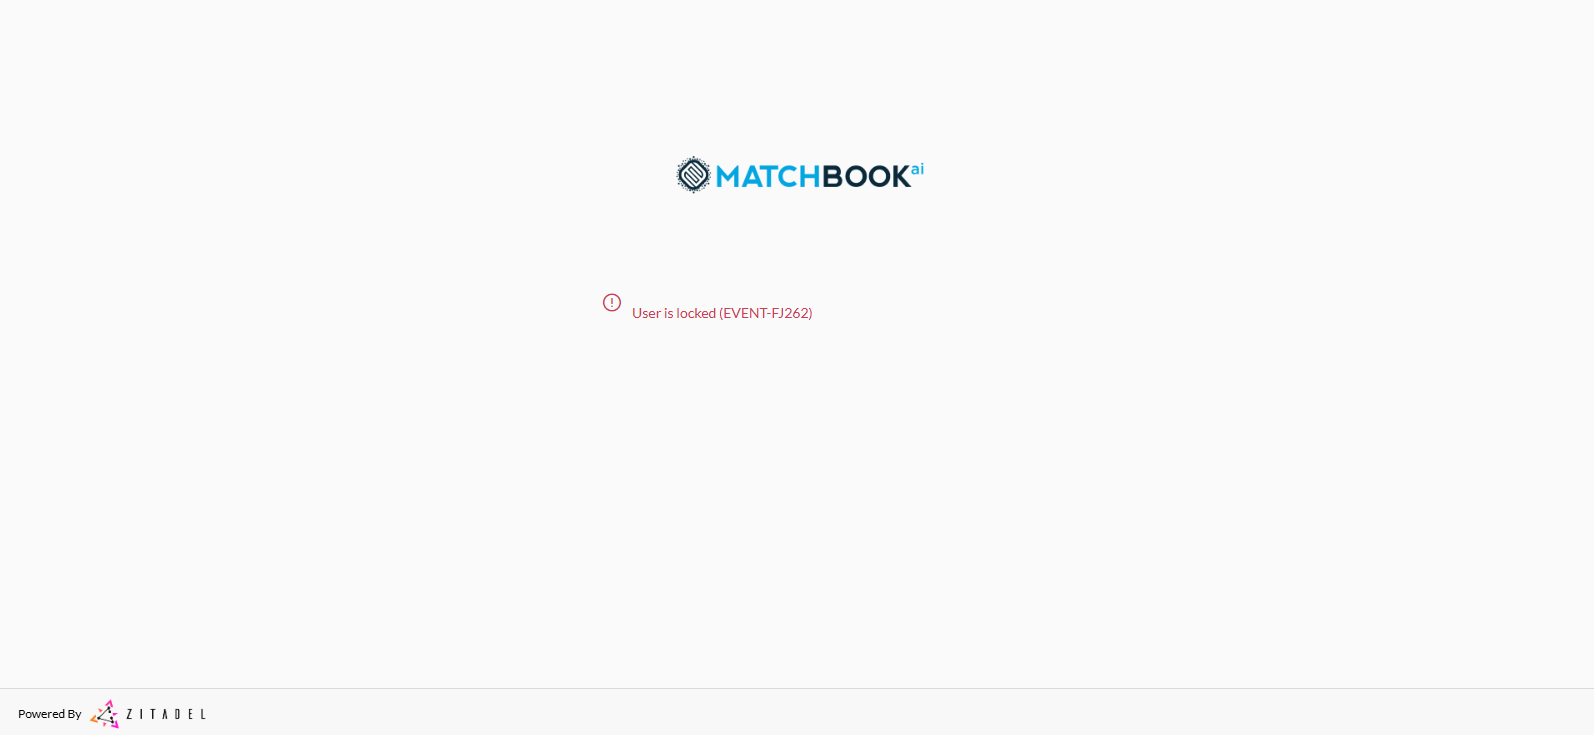
After the timeout expires, the user may attempt to log in again, and if configured, the system may also send an email with unlock or reset instructions.
Administrators can also manually unlock user accounts by navigating to the Settings tab from the left-side menu and selecting the User Management section. From there, choose the Edit User option and toggle the switch to Unlock User.
Settings->User Management-> Edit User-> Now toggle the switch to Unlock User
All account lockout and unlock activities are recorded for auditing purposes, ensuring full visibility and traceability of user access events.
Reset Password
If you have logged out and try to log in but forget your password, on the Login page, select your account (or you can select Other User, then you will be asked to enter your username and then click Next).
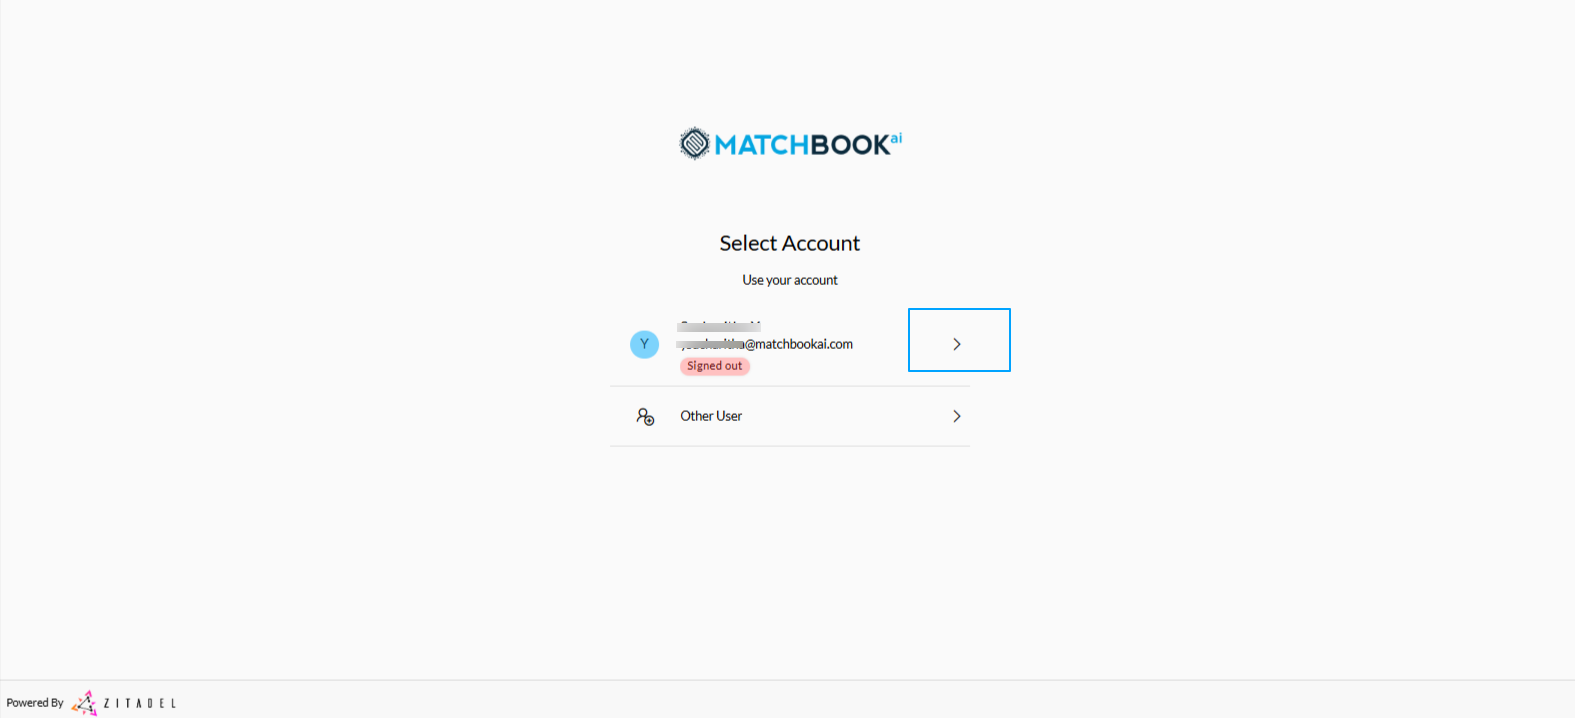
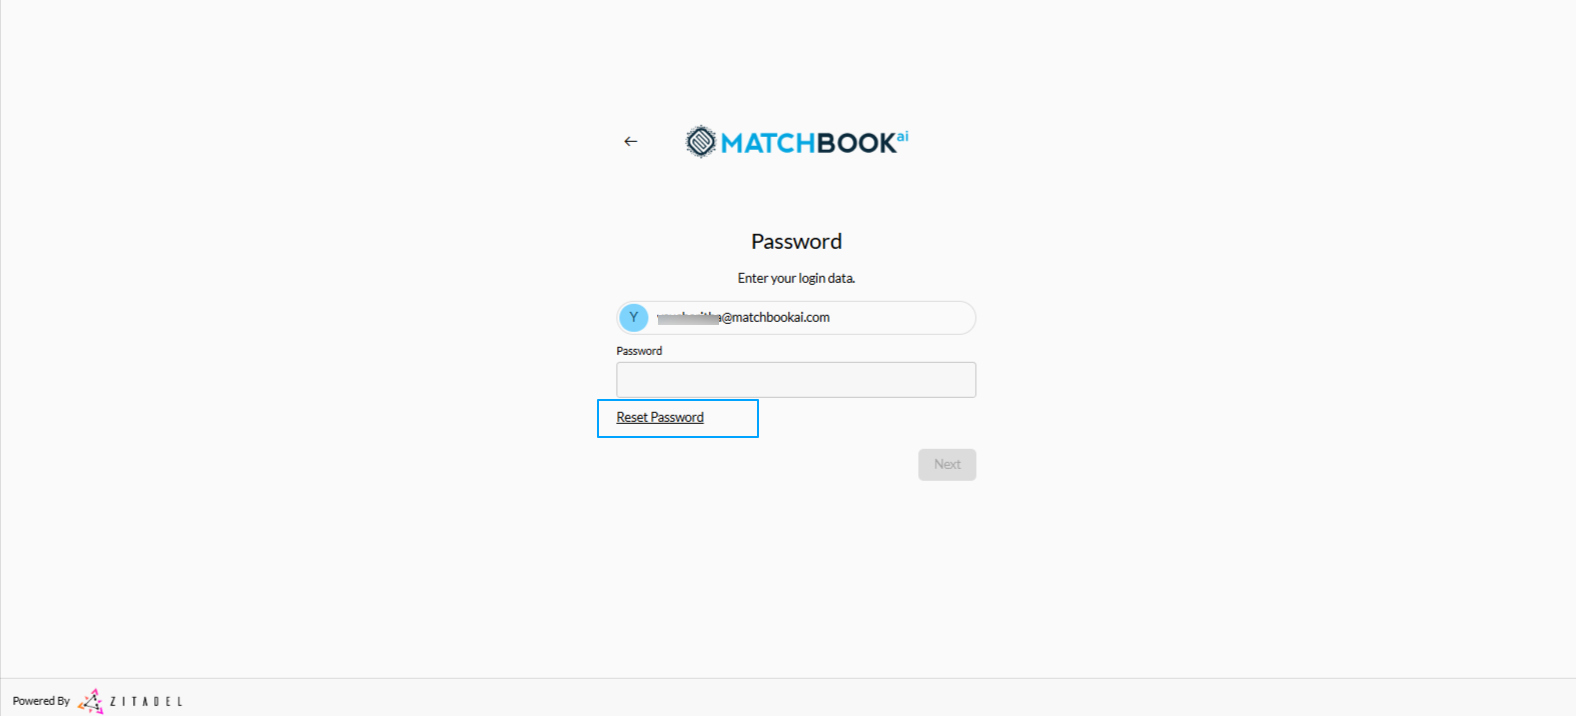
Then, you will be prompted to enter your password. To reset it, click on the Reset Password link.
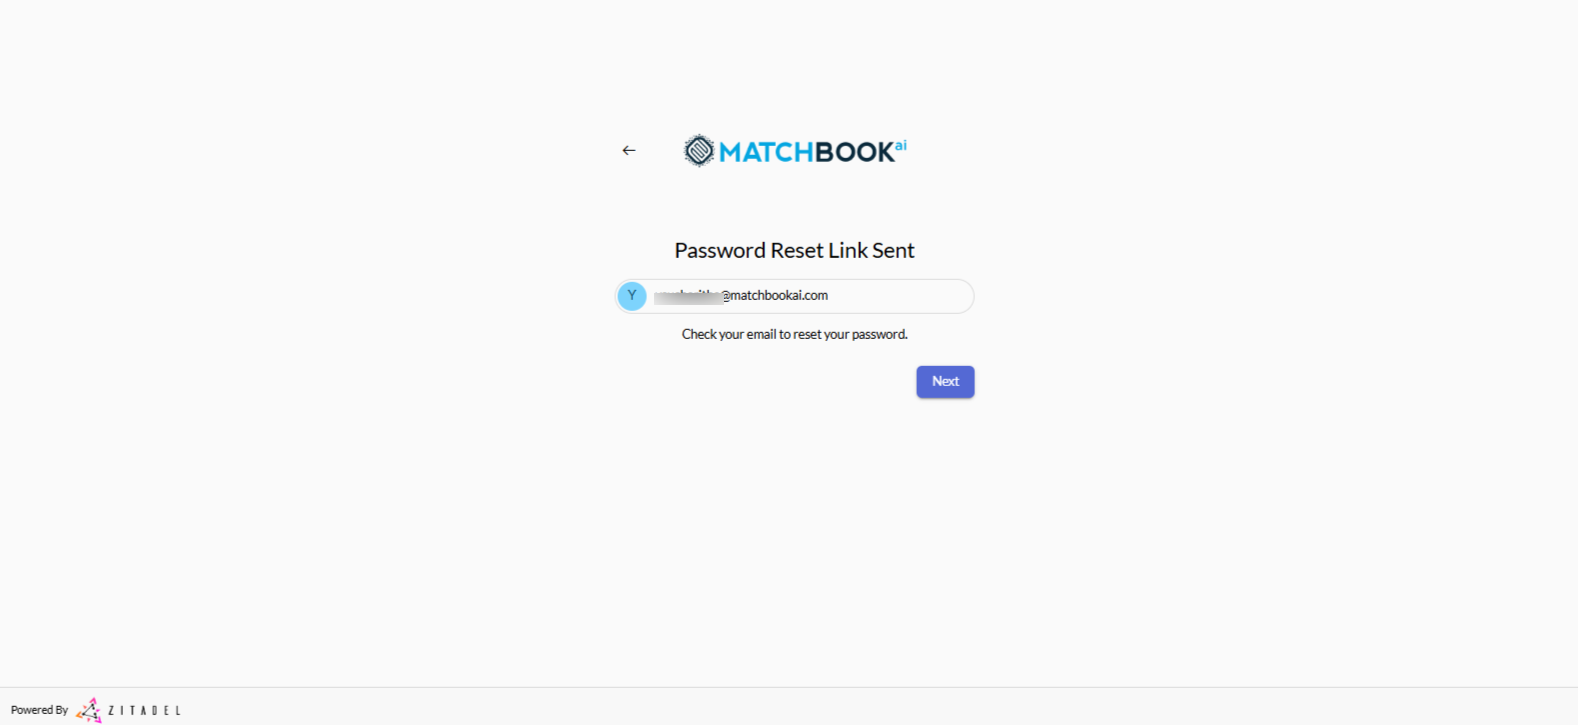
You will see a message: “Check your email to reset your password” on the Password Reset Link Sent screen.
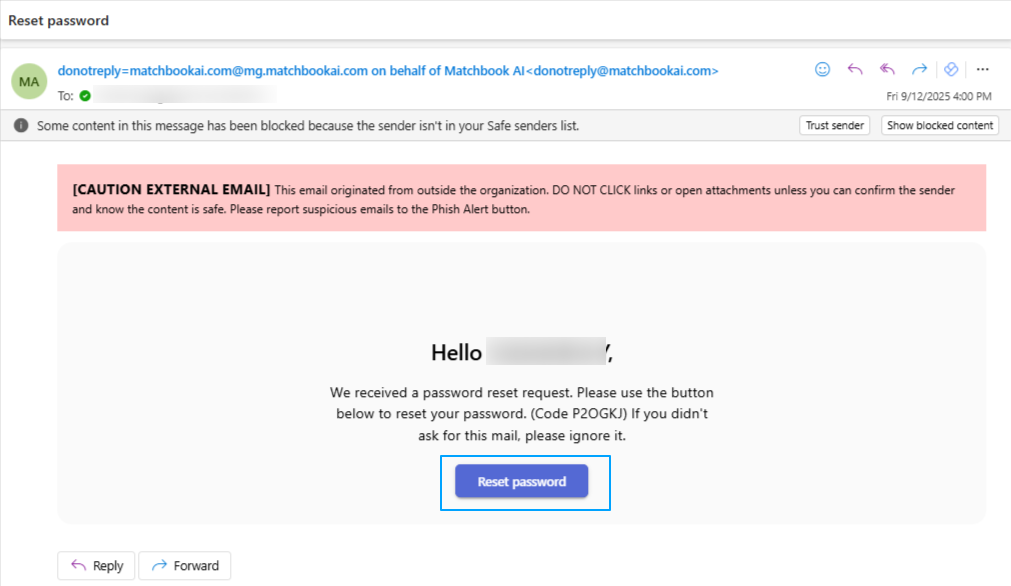
Check your inbox for an email notification titled, “Reset Password”.
The link will expire after 30 minutes for security purposes.
Copy the code and click on Reset Password. Then, you will be directed to a new page, that is Set Password page.
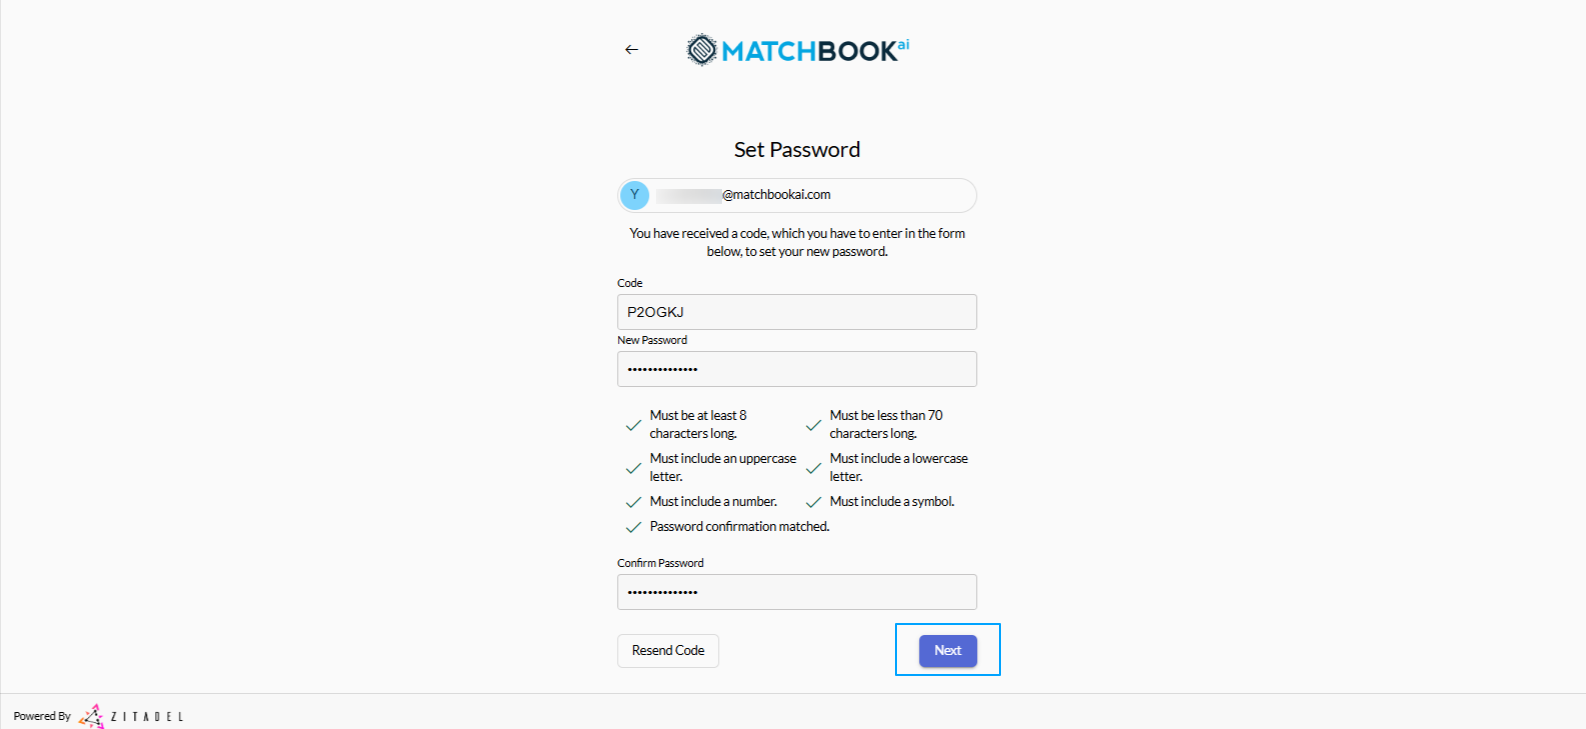
On the Set Password page, enter the code in the provided field. Then, you will be prompted to create a New password (your new password must be minimum of 8 characters and maximum of 70 characters, at least one uppercase letter, at least one lowercase letter, at least one number, and at least one symbol). Re-enter the new password to confirm in the Confirm Password field, then click Next.
If the two entries (password entered in New Password and Confirm Password fields) do not match, you will see the message: “Passwords do not match”.
Click on Resend Code if you didn’t receive the code.
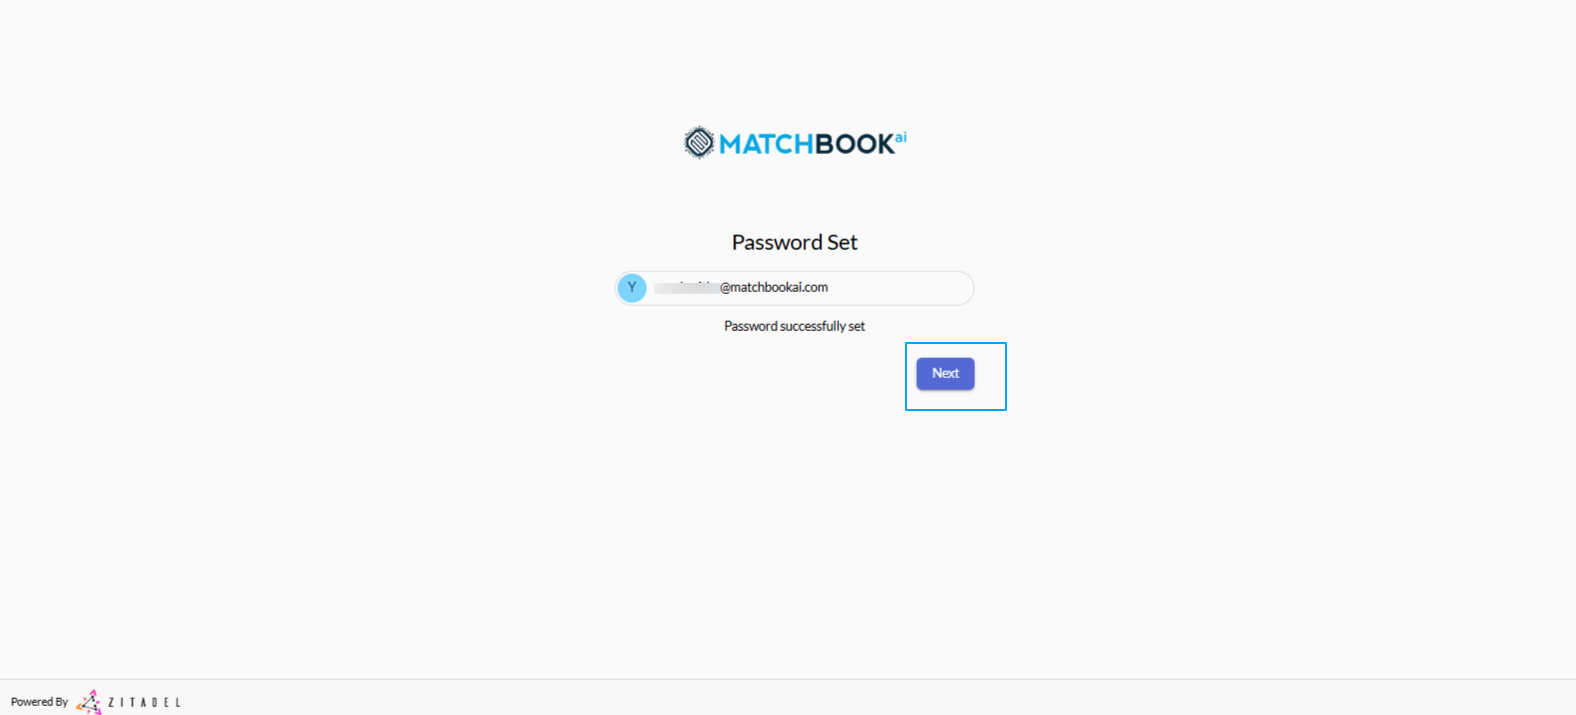
After successfully setting a new password, you will see the message “Password successfully set”. Now, click Next.
If the link has expired or is already used, you will see: “This link has expired or is invalid”.
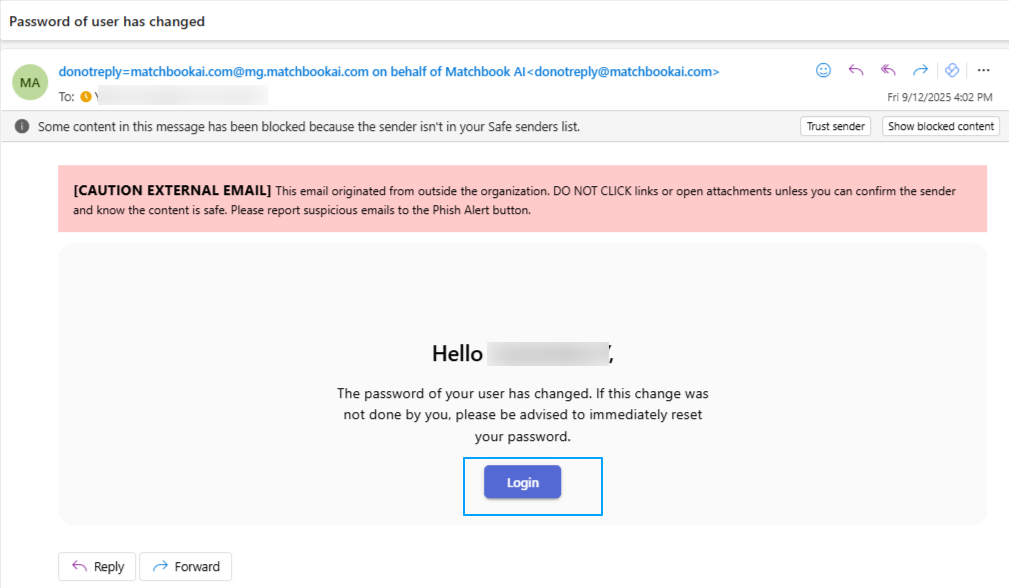
You will receive an email notification titled, “Password of user has changed”. From this email, you can click the Login button to access the XDM application with your new password.
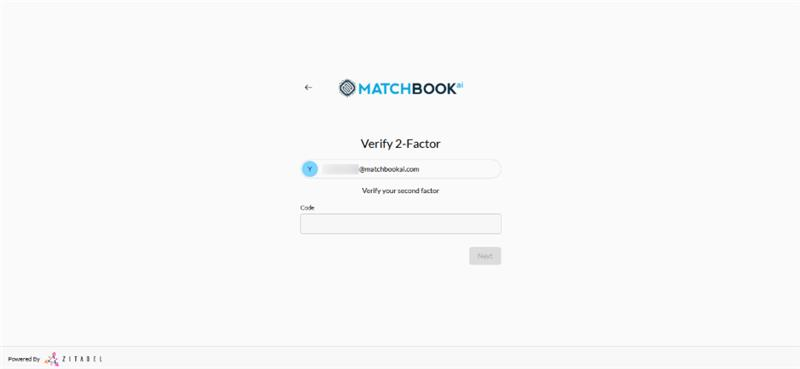
Next, enter the code to verify 2- factor authentication (if enabled at the time of registration) and click Next.
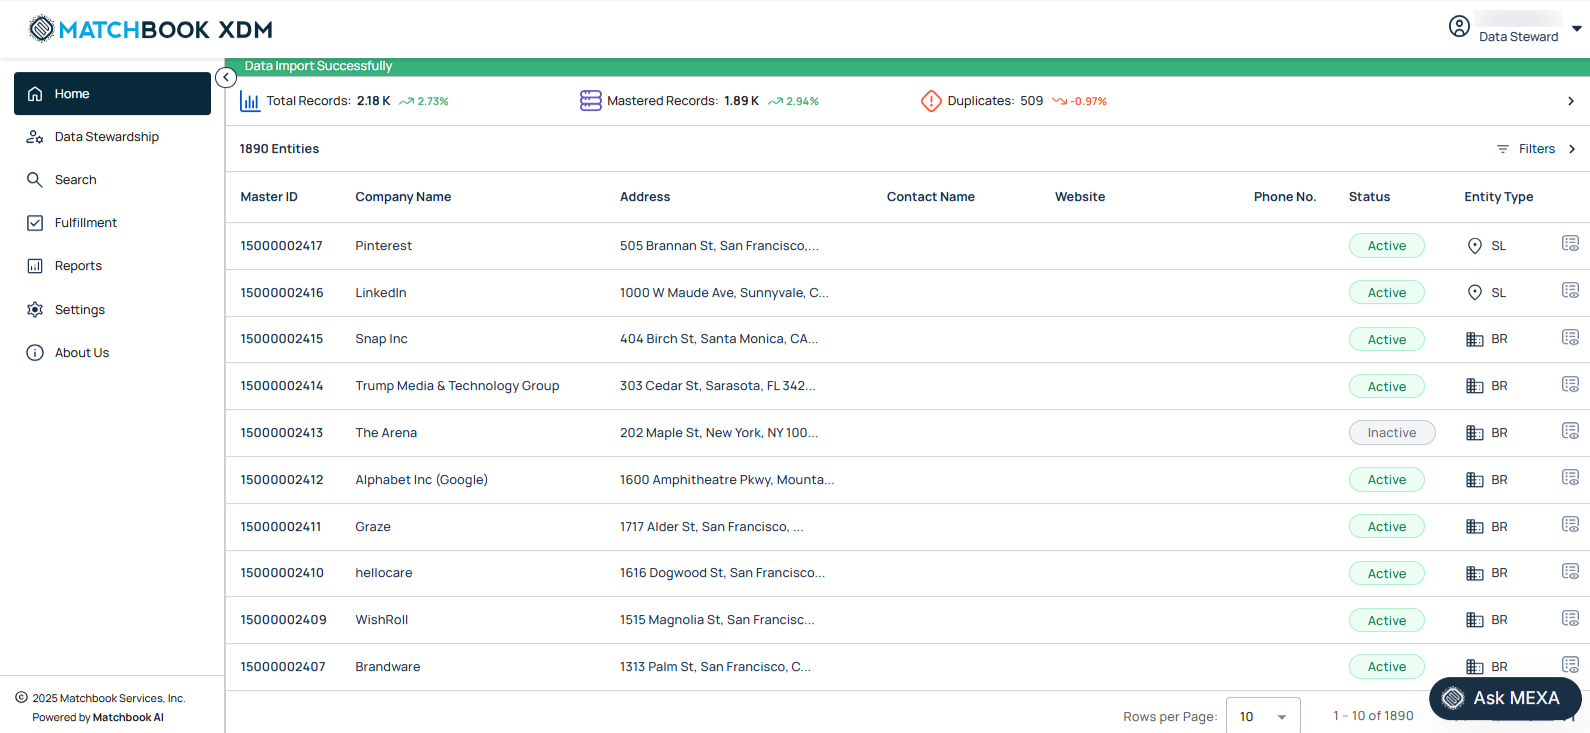
You will then be directed to the XDM user interface (go to Home section, where you can access features and perform tasks based on your assigned role and permissions).
Role Management and Access Control
The XDM application uses standard roles with predefined permissions to control access to features and modules. This ensures that each user only has access to the functionalities required for their responsibilities.
Standard Roles
The system provides the following predefined roles:
Admin: Full access to system settings, reports, and user management.
User: View-only access across the platform (except Settings). No action-based privileges.
Data Steward: Full access to Data Stewardship and Entity Details, with view access to other areas (except Settings and Fulfilment).
Fulfilment: Full access to Fulfilment, with view access to other areas (except Settings).
Standard roles are fixed. They cannot be deleted or renamed.
Access Permissions
Each role comes with a set of predefined permissions across modules such as Home, Data Stewardship, Search, Fulfilment, Reports, and Settings.
For example:
Admin users can create, edit, or remove users, assign roles, and manage system settings.
Users can view data across modules but cannot perform actions such as merge, reject, or import.
Data Stewards can perform actions like merging, rejecting, and reviewing records under Data Stewardship.
Fulfilment users can import, download, and manage fulfilment records.
Detailed permissions by role are outlined in the system (refer to the Role Permissions Matrix).
Additional Permissions
Some advanced features, such as Deep Research or Ask AI, are available as additional permissions.
If a user is assigned only the Admin role, the Additional Permissions section will not be available.
If a user has Admin + any other role, the Additional Permissions section will be accessible.
Role-Based Navigation
Admin users land directly on the Settings page after login.
Other roles land on the Dashboard (Home) by default.
By assigning the correct role(s), administrators can ensure that users only access the data and features relevant to their responsibilities. Multiple roles can also be combined (e.g., Data Steward + Fulfilment) to provide extended privileges.
XDM Navigation- Left panel